 Greetings!
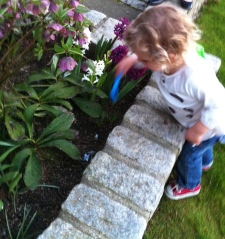
Now that the weather is warming up, so are the soils. It’s time to get out there and dig in the dirt. There is no better way to get acquainted (or reacquainted) with your garden than doing a few simple soil tests.
Go ahead, roll up your sleeves and embrace your inner scientist. Scientists of any age will make a few new discoveries with these investigations.
1. Worm party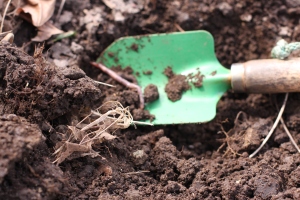
One of the best indicators of healthy soil is the size of the worm party that you find when you dig into it. First, examine the soil surface for worm castings (tiny worm manure) and burrow holes. Then, dig out about 6 inches of soil and count the number of worms squirming on your shovel. Three worms are good company; five are a party. No worms means you need to bust out the snacks and add organic matter to your soil so your worm friends have something to feed on.
Worms are the best
Worms aerate the soil to improve water infiltration and their tiny castings (worm poo) infuse the soil with enzymes, bacteria, organic matter and plant nutrients that help your plants grow stronger and faster.
Worm buffet
To encourage a worm party in your garden lay out a nice spread of organic matter. In the fall, I cover my garden beds with leaves to protect the soil from the heavy rains (and rains and rains) and give the worms something to eat over the winter. In the spring, you can add things that will break down more quickly–coffee grounds (an abundant urban resource), lawn clippings or composted manure all work well. My 80 year-old neighbour who has an AMAZING garden digs all of his vegetable scraps straight into his garden beds. There is definitely a wild worm party going on under his incredible tomato and bean plants.
2. The main squeeze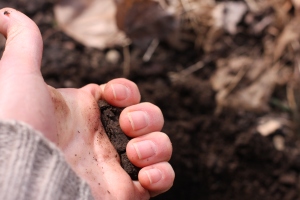
To figure out what your soils are made of just give ’em a squeeze. There are three general soil classifications: clay, sandy, or loamy. Clay is nutrient rich, but slow draining. Sand is quick draining, but has trouble retaining nutrients and moisture. Loam is the most enviable of soils–it retains moisture and nutrients but doesn’t stay soggy.
To determine your type of soil, take a handful of moist (but not wet) soil from your garden and give it a firm squeeze.
Open your hand, does it?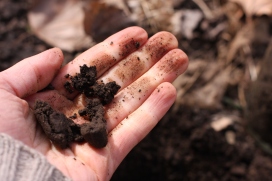
- Hold its shape and crumble when you gently poke it. Congratulations your main squeeze is a loam!
- Hold its shape and when poked stays firm. You’ve got a clay soil.
- Fall apart as soon as you open your hand.
Fetch the beach blanket, you’ve got sandy soil.
If you don’t have the perfect loam don’t despair, lay out the worm buffet of organic matter and it will improve. If you have very sandy or clay rich soil then you might want to consider adding peat moss for a quick injection of organic matter.
3. Shake it up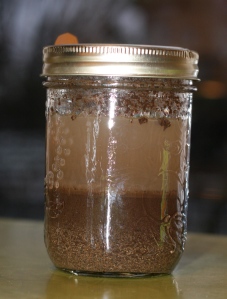
The squeeze test gives you a basic idea of your soil composition. If you want to get slightly more scientific, grab a straight-sided jar with a tight fitting lid, your shovel and dig a hole 6 inches deep. Fill the jar with about a cup of soil removing any sticks, worms or stones that sneak in there.
Add a little bit of dish soap (a few squirts of liquid soap or a tablespoon of powder will do), fill the jar with water, put on the lid and shake, shake, shake for about 3 minutes. Everyone can get involved.
All of the shaking lets the soap separate the soil particles for a more accurate test (this is totally scientific, wait till you see the chart below). Once you’re done shaking, set the jar on a flat surface where it can rest for a day or two while the soil particles slowly settle into layers.
The sand particles are the heaviest and will settle to the bottom in about a minute. Silt is the next heaviest particle and will settle out after about an hour. You can distinguish between the two because the silt layer is darker than the sand. Clay, the lightest particle in the mix, can take from one to two days to settle out. It will be fine textured and light in color.
This is when we get really scientific.
To figure out the percentages of sand, silt and clay in your soil sample measure the total amount of sediment (aka soil) with a ruler once it has all settled out. The total amount (say, 3 inches) represents 100 percent of the soil sample. To determine the percentages of sand, silt and clay measure each layer and divide by the amount of the total sample. Then, use the time-tested Soil Texture Triangle and see how your soil measures up in the classification.

Notice the sweet LOAM spot in the centre. Ah, soil perfection. But don’t fret if you’re off-centre, just note your soil type, add organic matter and adjust your watering to match your soil. Sandy soils are going to need more frequent watering, clay soils tend to get waterlogged so will be slower to warm in spring and can be over-watered, but they’re nutrient rich.
If the soil in different parts of your garden seem more sandy or clay-y than others you may want to do a test for each area.
4. pH(at) test
 Okay, you’ve squeezed, you’ve shaken, you’ve hosted a worm party, here is one more important test to try–a pH test. If you live on the west coast all of the winter rains have probably made your soil acidic (the water leaches out key nutrients that keep your soil from becoming acidic). Most plants are happiest with a well-balanced soil of 7 or 6.5. This is the pH level where the most nutrients are available–at pH 7.5 or higher your soil is alkaline, 6 or below it is acidic.
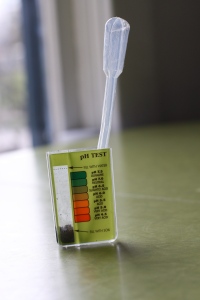
You can buy a very simple and inexpensive pH test kit at most garden or hardware stores, it’s quick and fun to conduct a little chemistry. The one I have cost less than $10 and with the magic of a secret powder, more shaking and a few minutes resting time it gives me the colour-coded answer of my soil pH.
Once you know your pH you can amend your garden (or garden plans) accordingly. Some plants–blueberries, foxgloves, azaleas, heather, and strawberries–prefer acidic soil. If you want to grow other fruits, vegetables or flowers you can add dolomite limestone or even finely crushed eggshells to increase the calcium and balance out the acidity.
Alright, good luck.
May your soils be rich and see you next week for more gardening fun.